Creating smooth transitions in your videos can significantly enhance their professional appeal. One of the most effective techniques to achieve this is by applying fade-in and fade-out effects. This guide will walk you through the steps to implement these effects using CapCut, a popular video editing tool
Understanding Fade-In and Fade-Out Effects
- Fade-In: This effect gradually increases the visibility of a video clip from black (or transparent) to full opacity, typically used at the beginning of a clip.
- Fade-Out: Conversely, this effect decreases the visibility from full opacity to black (or transparent), commonly applied at the end of a clip.
These transitions help in creating a seamless flow between different scenes or segments in your video.
Steps to Apply Fade-In and Fade-Out in CapCut
- Import Your Video:
- Launch CapCut and start a new project.
- Click on the “Import” button to add your video clips to the media library.
- Drag and drop the desired clip onto the timeline.
- Access the Animation Panel:
- Select the clip on the timeline.
- Navigate to the “Animation” tab located at the bottom of the screen.
- Apply Fade-In Effect:
- Within the “Animation” panel, click on the “In” tab.
- Choose the “Fade In” option from the list of animations.
- Adjust the duration of the fade-in effect by dragging the slider to your preferred length
- Apply Fade-Out Effect:
- Still in the “Animation” panel, switch to the “Out” tab
- Select the “Fade Out” animation.
- Similarly, adjust the duration to control how quickly the clip fades out.
- Preview and Export:
- Play back the clip to ensure the fade effects are applied as desired.
- Once satisfied, click on the “Export” button to save your edited video.

Tips for Effective Use of Fade Transitions
- Consistency: Maintain uniform fade durations across clips to ensure a cohesive look.
- Timing: Adjust the fade durations to match the pace of your video; slower fades for dramatic scenes and quicker fades for upbeat segments.
- Layering: Combine fade effects with background music or sound effects to enhance the emotional impact.
Troubleshooting Common Issues
Some users have reported issues with fade effects not functioning correctly after software updates. If you encounter such problems:
- Restart CapCut: Close and reopen the application to reset any temporary glitches.
- Update Software: Ensure you’re using the latest version of CapCut, as updates often fix known bugs.
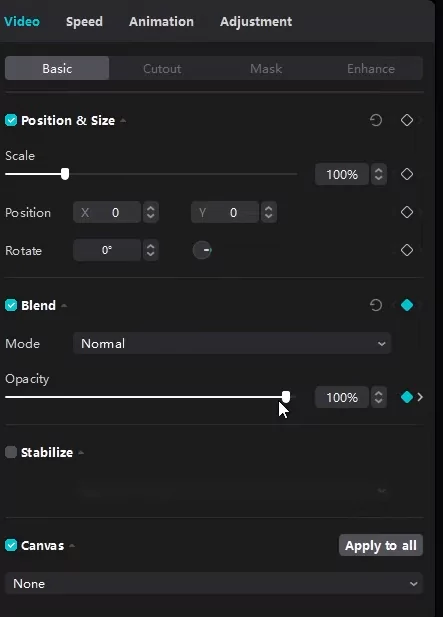
- Use Keyframes: Manually adjust the opacity using keyframes as an alternative method to achieve fade effects.
Visual Tutorial
For a step-by-step visual guide, you can watch the full tutorial here:
By following these steps, you can effectively utilize fade-in and fade-out effects to enhance the quality and professionalism of your videos using CapCut.
If the built-in fade-in and fade-out text animations are broken in CapCut, you can still manually recreate those effects using a combination of opacity keyframes and timing tweaks. Here’s how to do it:
Manual Fade-In/Fade-Out for Text in CapCut
Step-by-step (CapCut Desktop or Mobile):
- Add Your Text:
- Place your text on the timeline as usual.
- Make sure the text clip is selected.
- Go to Keyframes (Opacity):
- Move the playhead to the start of the text clip.
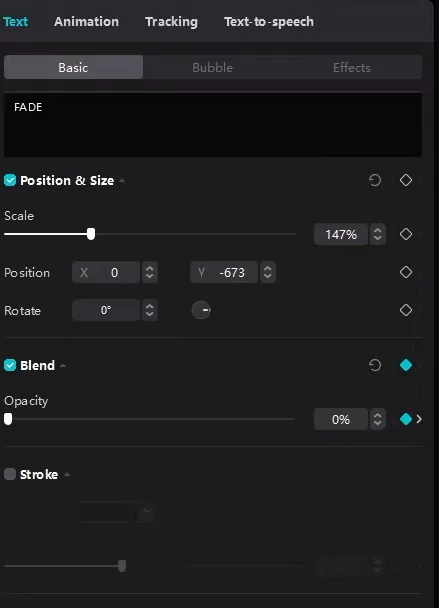
- In the “Basic” tab or settings panel, look for Opacity (or sometimes called “Transparency”).
- Set a keyframe at 0% opacity (completely transparent).
- Move a Few Frames Forward (0.5 – 1 sec):
- Move the playhead forward 10–20 frames (depending on how fast you want the fade).
- Set another keyframe at 100% opacity (fully visible).
- That’s your fade-in!
- Repeat for Fade-Out:
- Go to the end of the text clip.
- Set a keyframe at 100% opacity.
- Move a few frames backward, and set another keyframe at 0% opacity.

Tips:
- Ease in/out: If CapCut supports easing on keyframes, use a “linear” or “ease in/out” transition for a smoother effect.
- Duplicate for Consistency: Once you build this manually, duplicate the text layer to reuse the effect instead of recreating it each time.
- Use Presets (if available): Some CapCut versions have custom keyframe presets or templates — check the template library.
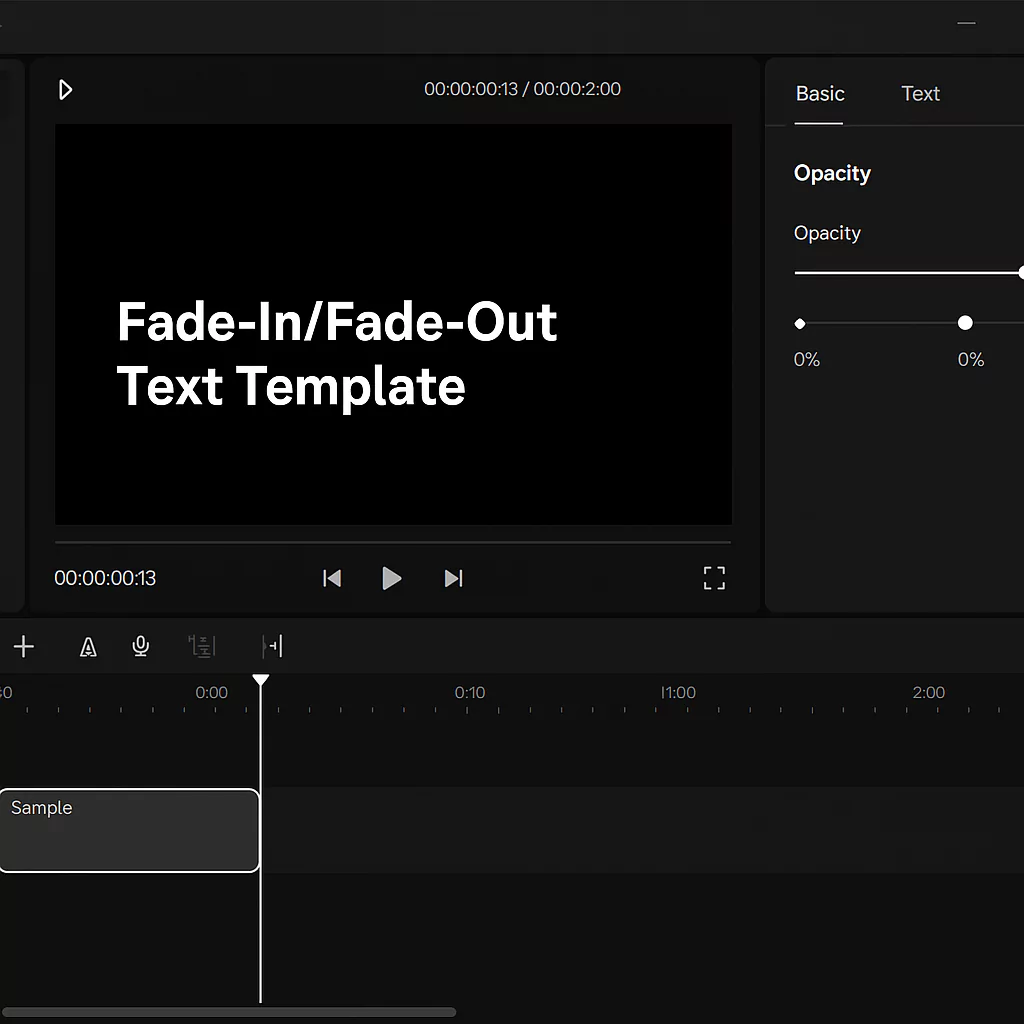
Let’s create a reusable fade-in/fade-out template for your text in CapCut so you don’t have to rebuild it from scratch every time.
How to Create a Reusable Fade-In/Fade-Out Text Template (Manual Keyframe Style)
Step 1: Create Your Fade Text Effect
- Add a Text Layer
- Just go to Text > Add text, and type anything (like “Sample”).
- Apply Manual Fade-In
- Place the playhead at the very beginning of the text clip.
- Set a keyframe at 0% opacity.
- Move forward about 15–20 frames (0.5–1 second depending on your project FPS).
- Set a second keyframe at 100% opacity.
- Apply Manual Fade-Out
- Move to the end of the clip.
- Set a keyframe at 100% opacity.
- Move backward 15–20 frames.
- Set a keyframe at 0% opacity.
Step 2: Make It Reusable
Now that you’ve built a smooth fade effect manually…
Option A: Duplicate It as a Base Template
- Right-click the text clip on your timeline and choose Duplicate (or use Ctrl + C / Ctrl + V).
- Replace the text content while keeping the animation/keyframes intact.
Option B: Export as a Custom Asset (for CapCut Desktop)
- Select your text clip with the keyframes.
- Go to the “My Assets” panel (or “Favorites” depending on your version).
- Look for an option like “Save as Template”, “Add to Favorites”, or “Save Effect”.
- Name it something like “Fade Text Template”.
💡 Now, anytime you want to use it, just drag your saved text template from Favorites into the timeline and update the text!
Bonus: Want to Animate Other Elements Too?
You can use this same opacity keyframe trick for:
- Images
- Stickers
- Overlays
- Logos
For a video tutorial on Fade In and Fade Out using CapCut for PC you may watch this below video:


